

Secret Lego Cave in a Playroom!?
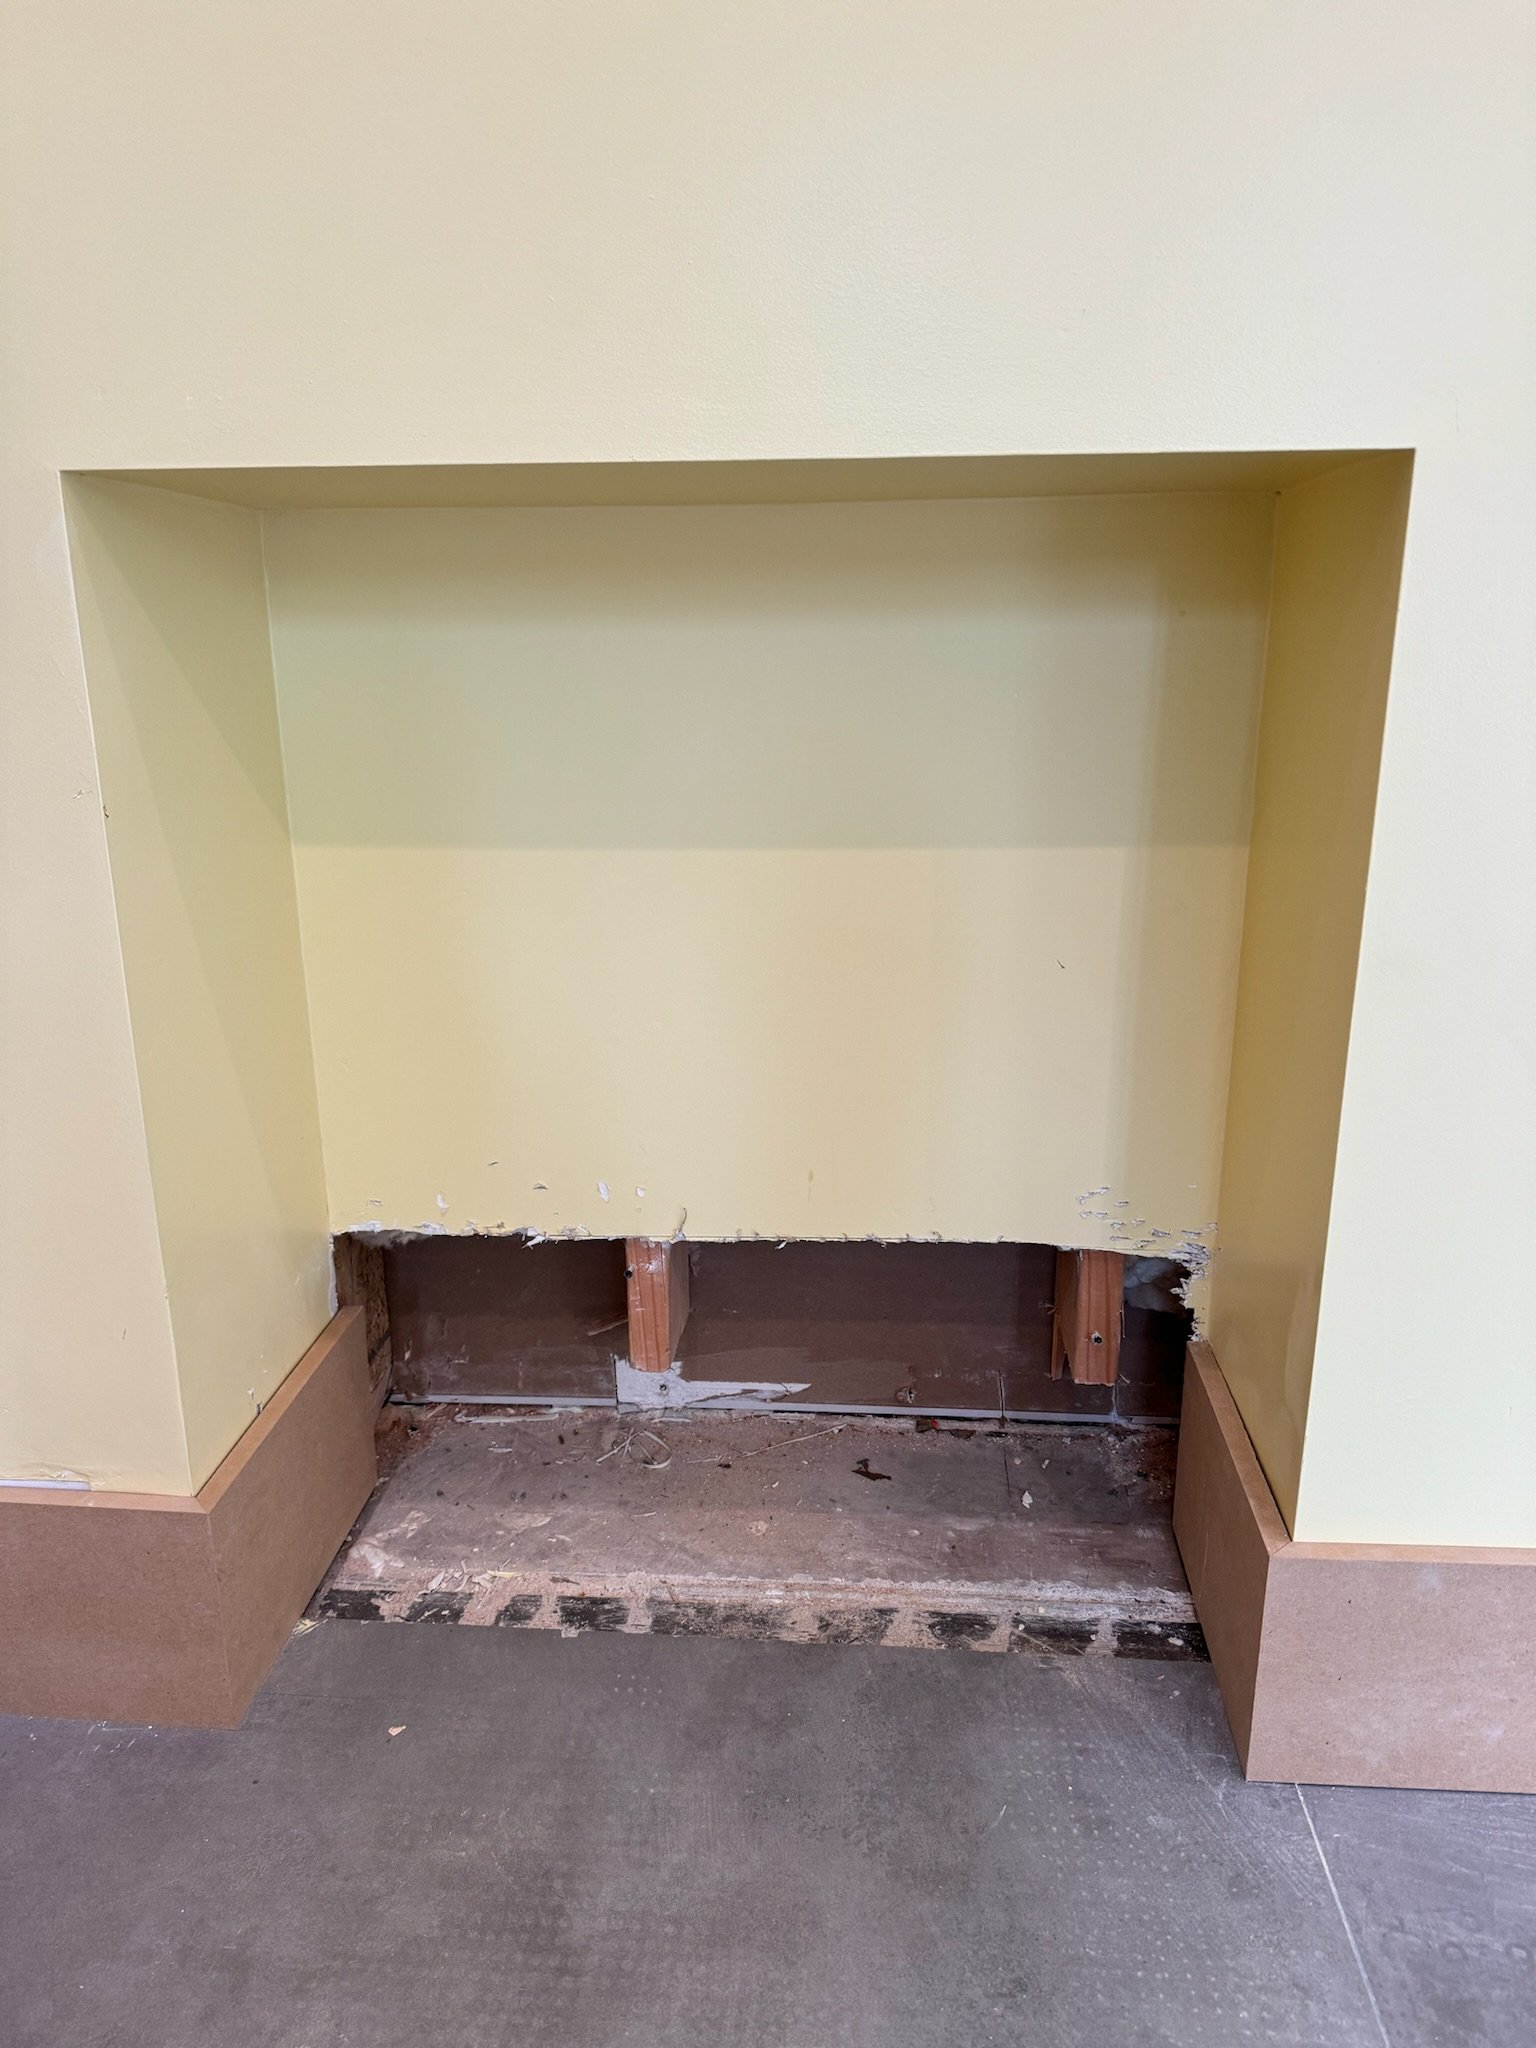
Our client wanted to include a secret passageway from their office to their playroom, so obviously, we obliged. A feature like this is one we all dreamt of as a child, but we also wanted to make it interactive. Thus, a Lego cave was born!

The basics
We began by measuring the surface area we needed to cover and decided that 27 Lego baseplates ($7.99 each) would be the right amount. The baseplates are 9.5x9.5 in. squares, which was a great size to cover the majority of the space. Since we were working within the confines of the passageway’s wall space and wanted a perfect fit, we ended up needing to cut some of the baseplates. It ended up being SO SIMPLE. Read below to learn how to DIY!

Chop Chop
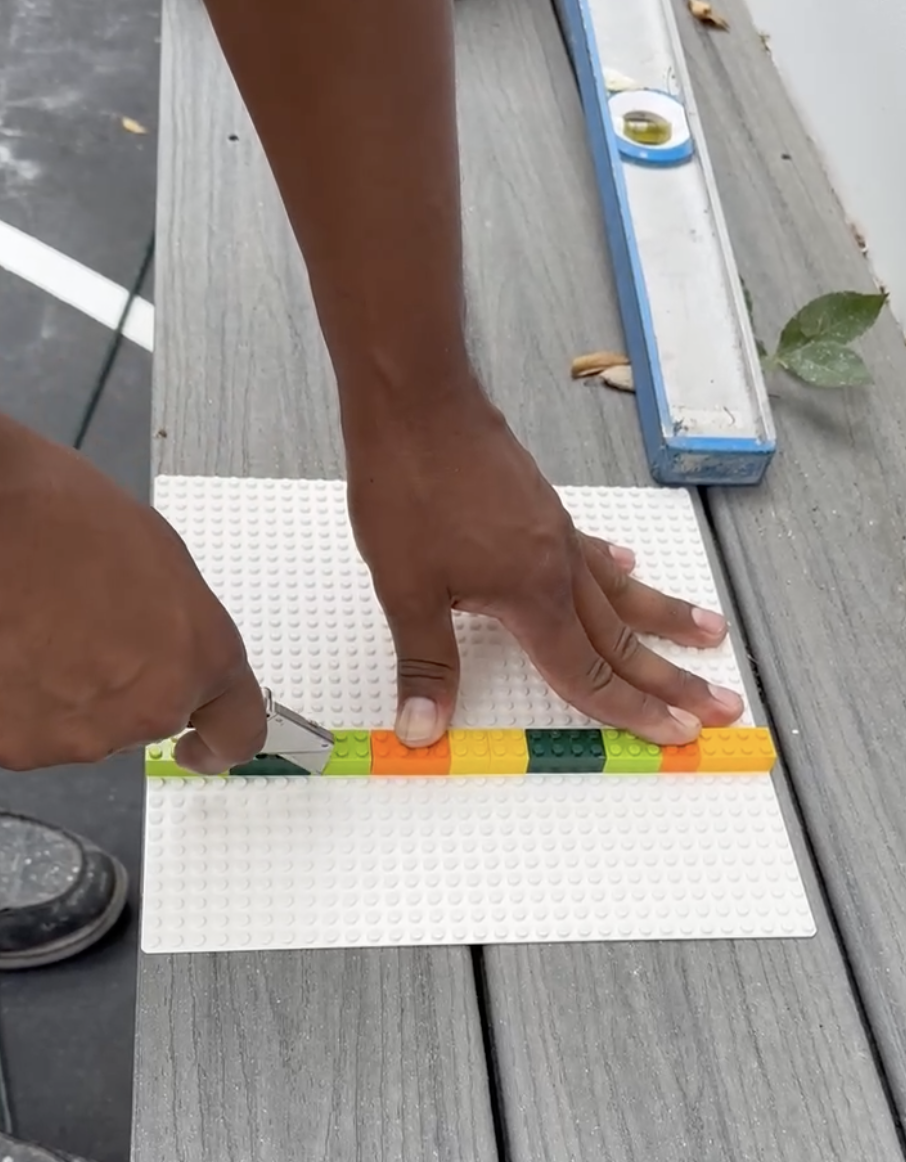
To cut a Lego baseplate…
1. Decide the desired width of your baseplate. This must be measured in baseplate rows and NOT in inches because you’ll have to cut in between the pegs.
2. Place Lego bricks along the row where you’ll cut, they will act as a straight edge.


3. Place your baseplate on a solid surface that you don’t mind scratching, like a work table or piece of wood.
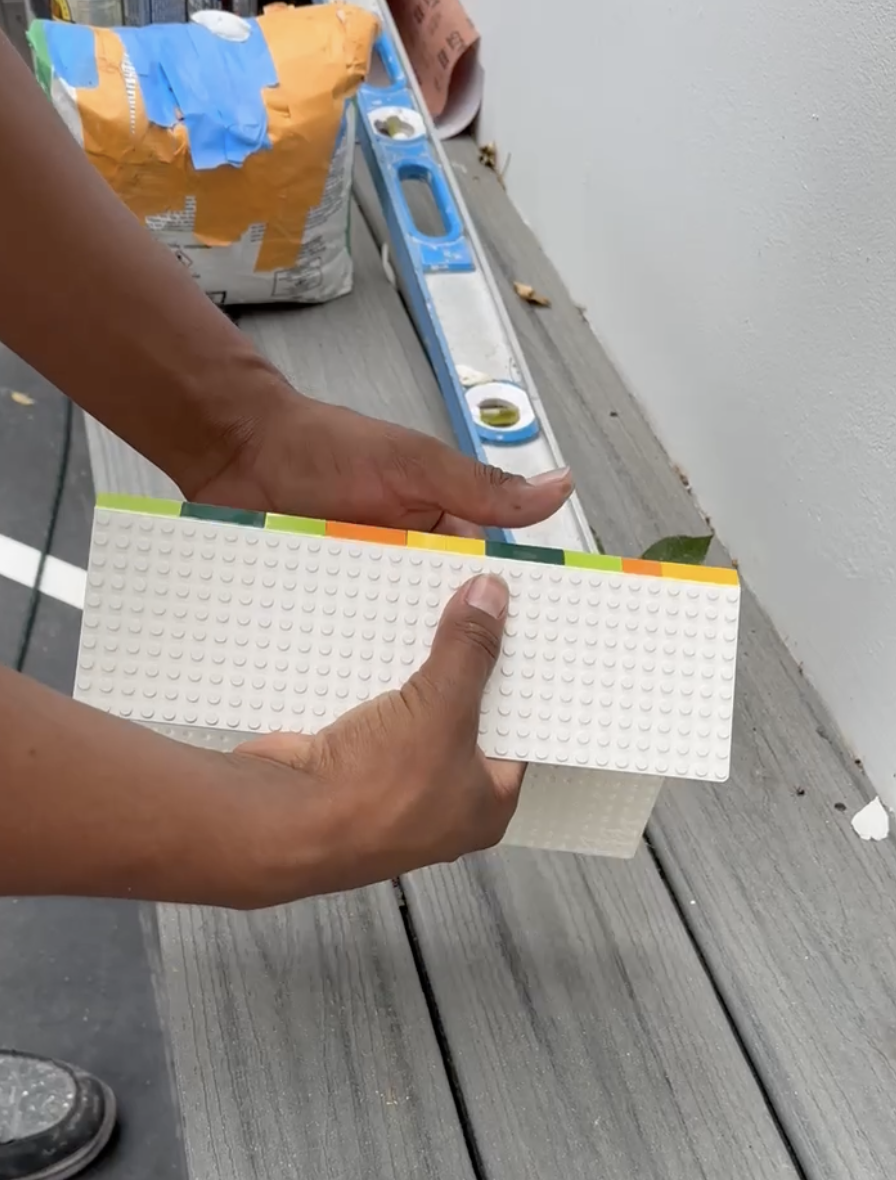
4. Use a box cutter to firmly cut along the Lego bricks from top to bottom, which may take a couple slices! Make sure you’re cutting along the correct side according to your measurements!
5. Fold over, remove the bricks and voila! You now have a custom-sized baseplate!
Sticky Situation
We secured our baseplates with caulk and silicone glue and both were equally sticky (two handymen were part of the installation process and each preferred a different type of adhesive). Once covered in adhesive, they stuck the baseplate directly on the wall. If you’d prefer not to put such a strong adhesive on painted drywall (which would require some repairs upon removal) then you can attach plywood in between the wall and baseplate.


Step by Step
Before adhering any plates to the wall, you may want to consider the color of your plates and the surface they’ll be attached to. Even when applied directly next to each other, a sliver of wall can be seen in between the plates. Consider painting the wall a color similar to the baseplate for a more cohesive look.
Apply your adhesive of choice to the back of the first baseplate in a squiggly pattern. Avoid putting too much next to the edges, as it tends to seep out when pressed down.
Align the first baseplate with a straight edge like the floor, baseboard, or the edge of your plywood and firmly press it against the surface.
Attach a few Lego bricks to the edge of the next plate so that half hangs off.
Apply adhesive to your second plate and press it onto the wall. During that process, attach the bricks that are hanging off to the first plate, so the two plates get joined together. Putting the edges exactly flush will leave you with pegs that are TOO close together, resulting in Legos not attaching to the edge pieces. The bricks help distance them correctly!
Continue this process until your surface is covered!


Easy Access
We wanted to encourage Lego play (and clean up) as much as possible so hung toy dispensers (currently out of stock, but should come back!) directly above the cave. We put it at a height that was easy to grab from and toss into after.


A Lego cave is pretty unconventional, we know. And building with Legos in any capacity will yield positive outcomes from fine motor skills to strategic planning. BUT building vertically or UPSIDE DOWN is good for the brain, people! Neuroplasticity is the brain’s ability to change and adapt, and even a small shift like this one offers a fresh stimulus and challenge to young children- a literal new perspective. Sooooo if you have a Lego fanatic on your hands, consider a unique feature like this and be ready to be wowed by everything they create with it!